Home Blog Page 6

The Ultimate Vegetarian Chili Recipe: A Feast For The Senses!

0

Discover how to make the best vegetarian chili ever! Packed with rich flavors and wholesome ingredients, this chili is perfect for any day of the year. 

Are you ready to make a huge batch of the best veggie chili recipe, which is incredibly tasty and full of healthy goodness? Even meat lovers will want seconds of this veggie chili because it is so hearty and tasty. This chili will become a regular in your kitchen because it is great for cozy nights or making meals ahead of time.  

Ingredients to Gather 

These fresh, colorful ingredients are the first step in making this veggie treat. This is what you will require:  

1. Olives: Adding olive oil to veggies while they are cooking makes them taste better.  

2. Vegetables: Onion, celery, green bell peppers, and jalapeños give this dish a little heat.  

3. Canned Foods: You will need a kidney, garbanzo, and black beans, as well as green Chili’s peppers and whole skinless tomatoes. Do not remember the sweet corn with the whole seed!  

4. Spices: Dried oregano, salt, ground cumin, bay leaves, fresh garlic, chili powder, and a little ground black pepper will bring all the tastes together.  

5. Vegan Burger Crumbles: These give the chili a tremendous meaty texture without the meat, making every taste better.  

Cooking Your Vegetarian Chili 

This is a quick guide on how to put it all together:  

1. Create your base: In a big pot, bring the olive oil to a medium-low temperature. Add the onions and cook them until soft and clear. 

2. Make it more interesting: Add the cumin, chili powder, garlic, and other spices. Let them toast for one minute until they smell good. 

3. Veggie Medley: Put in the jalapeños, celery, and green bell peppers. Cook them until they begin to soften.  

4. Vegan Snacks: Add the veggie burger bits and mix them in. A slight browning will make the chili taste better.  

5. Put in the Cans: Add the green chilies, whole tomatoes that have been peeled, and all the beans. To get the juices out of the tomatoes, crush them a bit. Once the mixture starts to boil, turn down the heat and let it cook slowly.  

6. Cook and Serve: Let the chili cook for about 45 minutes so that all tastes can blend perfectly. Add the corn in the last five minutes of cooking.  

Serving Your Chili 

This chili is great for vegetarians. It goes well with warm, rich cornbread or corn muffins. Add shredded cheese, fresh avocado pieces, sour cream, or crispy tortilla chips as a garnish to make it look and taste better.  

How to Store and Freeze  

Chili made ahead of time can be kept in the fridge in a sealed container for up to a week. Additionally, it freezes well. Let your child cool down before putting it in a freezer-safe container, allowing it to expand. Thaw it overnight in the fridge and heat it on the stove or microwave when ready to eat it again.  

You should try this vegetarian soup whether you have been a vegetarian for a long time or are just trying to eat more plant-based foods. It is easy to make, tastes great, and makes a warm meal everyone loves. It is incredible how delicious vegetarian food can be!  

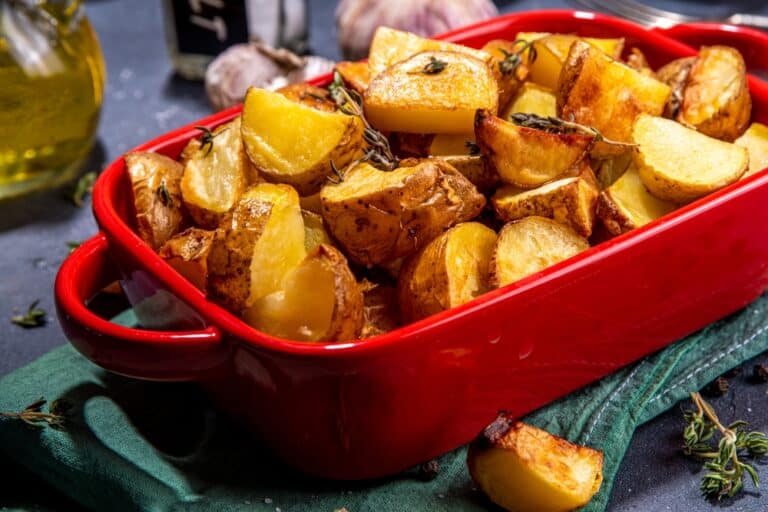
The Perfect Oven Roasted Potatoes: A Simple And Delicious Side Dish

As a side food, oven-roasted potatoes are great because they are easy to make and taste. This recipe, which JMRYGH provided and last changed on February 23, 2023, says that the potatoes will be crispy, golden brown, and full of flavour. Now, let’s talk about how to make this tasty, easy dish that goes with almost any meal. 

How to Roast Potatoes in the Oven

1. Get the oven hot

Before you put the potatoes in the oven, heat it to 475 degrees F (245 degrees C). A high temperature is essential for getting the right crispy outside.

2. Get the spices ready

Cut up the garlic and put it in a big bowl. Add the dried basil, marjoram, dill weed, thyme, oregano, parsley, crushed red pepper flakes, and salt. Please make sure all the herbs and spices are spread out evenly by mixing them well.

3. Cover the potatoes

Put the cubed potatoes in the bowl and mix them around so that they are covered in the oil and salt mixture. This step is very important because it ensures that every potato piece tastes great.

4. Put on a baking sheet

Spread the potatoes out in a single layer on a baking sheet or roasting pan. When roasting, make sure they don’t touch each other to get them crispy on all sides.

5. Put the potatoes in the oven

The oven should already be hot when you put the baking sheet in. Roast for 20 to 30 minutes. Turn the potatoes occasionally to ensure they cook evenly on all sides. They are done when they are soft and golden brown.

6. Serve and have fun

Take the potatoes out of the oven when they are done and serve them hot. That’s right; they’re great as a side dish for breakfast, lunch, or dinner. 

How to Make Perfectly Roasted Potatoes in the Oven 

  • Even Size: To ensure your potatoes cook properly, cut them into pieces that are all the same size.
  • Don’t Cram the Pan: It is essential to ensure the potatoes have enough room on the baking sheet to cook without steaming.
  • Turn every so often: A few turns of the potatoes during cooking help them brown evenly.

Different Ways to Make It 

  1. For Cheesy Roasted Potatoes, add chopped Parmesan cheese to the potatoes during the last 5 minutes of roasting.
  2. Adding fresh herbs like rosemary or thyme will taste even better.
  3. Add a pinch of cayenne or more crushed red pepper flakes when you want a hotter version. 

Keeping leftovers safe 

If you have any leftovers (which you might not because they’re so good!), put them in a jar that won’t let air in and put them in the fridge for up to three days. To keep their crunchiness, reheat them in the oven or stove. 

Potatoes cooked in the oven are a simple, tasty side dish that can improve any meal. They will become a family favorite because they have just the correct number of crisp herbs. If you try this recipe, you will love the delicious flavors and pleasing crunch of home-cooked roasted potatoes. 

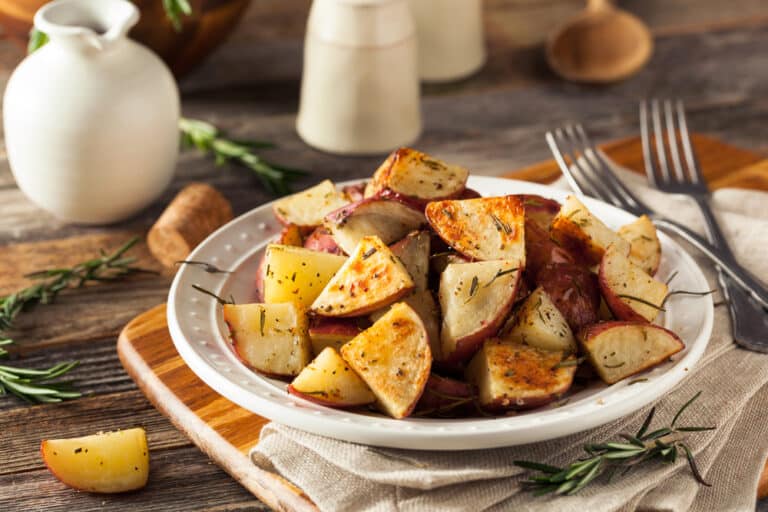
Roasted New Red Potatoes: A Deliciously Simple Recipe

0

Hey, you food lover! Want a tasty side dish that is easy to make? Roasting fresh red potatoes is a standard and delicious way to warm up. You’ll love eating them with meals because they are sweet and crunchy. What was the most fun part? This side dish only needs a few easy things. It will take a little while to make and taste great. Get ready for a simple way to roast fresh red potatoes now.  

How to Roast Red Potatoes 

Fresh red potatoes make any meal better when they’re cooked. It’s golden brown and crunchy on the outside and sweet and soft on the inside. Also, since they are small and have thin skin, they are easy to cook. They taste great with olive oil, salt, and pepper. When you cook red potatoes, they naturally get sweet and earthy. They make a great side dish for any occasion, from a typical weeknight dinner to a big party or celebration.  

Prep Time: 10 minutes

Cook Time: 35 minutes

Total Time: 45 minutes

Servings: 4-6 

Ingredients: 

  • 2-3 pounds new red potatoes, halved or quartered 
  • 2 tablespoons olive oil 
  • 1 teaspoon salt 
  • 1/2 teaspoon black pepper 
  • 1/2 teaspoon garlic powder (optional) 
  • 1/2 teaspoon paprika (optional) 

Instructions: 

  1. Initialize the oven to 425°F (220°C). 
  2. Put the potatoes in a large bowl and add the paprika, salt, black pepper, garlic powder, and olive oil. Mix the potatoes until they are all covered.
  3. Gently wash and dry the potatoes. Arrange them in a row on a parchment-lined baking sheet.
  4. Place the potatoes in the oven and cook them for 45 minutes or until they are light brown and soft. Turn them over in the middle of the cooking time.
  5. Let the potatoes cool down after taking them out of the oven.
  6. Put it out hot and have fun! 

Tips and Variations: 

  • Cook the potatoes at 450°F for the first 20 to 25 minutes, then lower the heat to 425°F (220°C) for the rest of the time. This will make the outside crispy. 
  • Remember not to put too much in your pan. 
  • Cheesy Delight: The melted cheese has a deliciously rich and creamy taste. In the last five minutes of baking, sprinkle some diced cheddar or mozzarella cheese on top. 
  • Veggie Medley: We can cook a rainbow of vegetables with your potato roast. Using Brussels sprouts, carrots, parsnips, red onions, or parsnips as examples, just put your favourite veggies in the baking pan. This is a delightful and good-for-you treat. 
  • Spice it up: To improve the taste of your baked potatoes, add your favourite toppings and spices, such as tasty olives, sun-dried tomatoes, paprika, or cayenne pepper. 

Making these roasted new red potatoes is easy, and they taste great. After eating them, you will feel good and complete. After that, why wait? Gather some potatoes, be creative with the toppings, and enjoy the warm taste of freshly roasted red potatoes. 

Quick Slow Cooker Turkey Chili: A Comforting And Easy Recipe

Nothing beats a filling bowl of chilli if you want to warm up on a cold day. This quick turkey chilli made in the slow cooker is a great choice. Putting everything in the slow cooker and letting it do its thing makes it very simple.  

Ingredients for Quick Slow Cooker Turkey Chili 

This simple turkey chilli recipe requires essential ingredients that you might already have in your pantry: 

  • One tablespoon vegetable oil: To brown the turkey. 
  • One pound ground turkey: A lean protein base for your chilli. 
  • Cooking spray: To coat the slow cooker. 
  • 2 low sodium (10.75 ounces) tomato soup cans: Provides a rich tomato base. 
  • 2 (15 ounces) cans of kidney beans, drained: Adds heartiness and fibre.   
  • 1 (15-ounce) can black beans, drained: Another layer of texture and protein.    
  • ½ medium onion, chopped: Adds flavour and a bit of crunch. 
  • 2 tablespoons chilli powder: For that classic chilli taste.    
  • ½ tablespoon garlic powder: Enhances the overall flavour.  
  • ½ tablespoon ground cumin: Adds warmth and depth.  
  • One teaspoon red pepper flake: For a bit of heat.  
  • One pinch of ground black pepper: To taste.  
  • One pinch of ground allspice: For a subtle, unique flavour.    
  • Salt to taste: Adjust as needed. 

Shortcuts for Making Turkey Chili in the Slow Cooker 

This easy turkey soup can be made in a slow cooker by following these steps: 

1. Get the ingredients: Ensure you have everything ready to go. 

2. Cook the Turkey: Put the vegetable oil in a pan and heat it over medium-low heat. After you add the ground turkey, cook it until it’s all cooked. Take out any extra fat. 

3. Get the Slow Cooker Ready: Use cooking spray to coat the inside of your slow cooker so that food doesn’t stick. 

4. Combine the ingredients: Put the cooked turkey, tomato soup, kidney beans, black beans, and chopped onion into the slow cooker. 

5. Season: Add salt, black pepper, cinnamon, red pepper flakes, cumin, chilli powder, and garlic powder. Combine well by stirring. 

Cover the slow cooker and set it to Low for 8 hours or High for 4 hours. This will allow the flavours to mix nicely. 

Ideas for Serving 

Once it’s done, please put your favourite sauces and sides on top of your chilli. Feel free to try these ideas: 

  • Toppings: On top are cut green onions, shredded Cheddar cheese, crushed corn chips, and sour cream. 
  • Sides: For a full meal, serve with warm cornbread, a simple salad, or baked potatoes. 

Suggestions for Making the Best Turkey Chili 

  • Brown Turkey: Adding the turkey to the slow cooker gives it more flavour after browning.
  • Change the Spicy: Change the amount of red pepper flakes to suit your taste for heat.
  •  Make it Heartier: Add more veggies, like carrots or bell peppers, to make it healthier and give it more texture.

Putting away and Heating Up 

  • Refrigerate: You can keep extra turkey chilli in the fridge for up to four days in a container that won’t let air in. 
  • Freezing: You can freeze the chilli for up to three months. All you need to do is put the extra food into freezer bags with about an inch of room at the top. Let it thaw overnight in the fridge, then heat it on the stove or microwave. 

This Turkey Chili in a Quick Slow Cooker is great for busy weeknights or when you need a meal that cooks itself. Thanks to its hearty ingredients and intense flavours, it’s sure to become a family favourite. This delicious chilli dish is easy and comforting. 

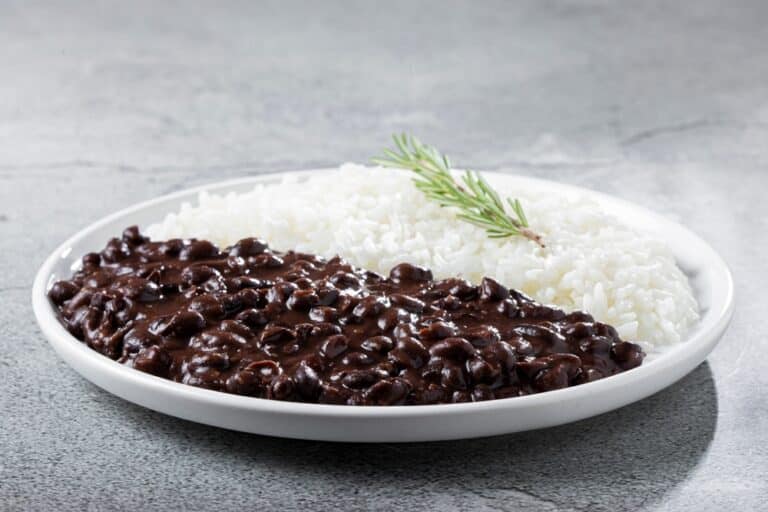
Quick & Nutritious: How To Make Classic Black Beans And Rice

0

Hello, friends! Are you ready to change up your meal routine with a quick, cheap, and tasty meal that only takes 30 minutes to make? This exciting Latin American pair isn’t just a regular. Favorite is a classic food for a good reason: it’s cheap, full of protein and fiber, and can be eaten as a main dish. This old recipe will become your new best food friend for dinner during the week when you’re busy. Let’s make something tasty, shall we? 

Why black beans and rice: 

There are a lot of fancy and extravagant foods out there, but black beans and rice are still the unsung stars of the kitchen. There is a lot of culture history in Latin America, and this pair is a nod to that. Plus, it has a lot of protein, fiber, and vitamins, so you can eat it without feeling bad about it. It’s good for your body and brain. At every bite, the creamy beans, fluffy rice, and hint of spice will take you to a world of bright tastes, smooth textures, and warm, fuzzy feelings. If you want to give your taste buds a hug, black beans and rice are the best thing ever. 

Prep Time: 10 minutes 

Cook Time: 20 minutes 

Total Time: 30 minutes 

Servings: 4-6 

Ingredients: 

  • 1 cup dried black beans, soaked overnight and drained 
  • 2 cups water 
  • One tablespoon of olive oil 
  • 1 onion, chopped 
  • 2 cloves garlic, minced 
  • 1 teaspoon cumin, dried oregano, Salt and pepper, to taste 
  • 2 cups cooked white rice 

Instruction: 

Cooking black beans and rice is easy! While the pot is hot, add the olive oil and cook the onion, garlic, and bell pepper until they are soft. Add black beans that have been soaked overnight and rice that has been cooked in oil.  

Then, add enough water to cover everything. Salt, pepper, oregano, cumin, and garlic powder should be added to taste. Once the pot starts to boil, lower the heat and let it cook for 20 minutes. Keep an eye on it so that the liquid doesn’t rise to the top of the rice. Put it in a low heat and wait 15 minutes. After that, take it off the heat and leave the lid on for 5 to 8 minutes. Lastly, use a fork to fluff everything up and serve hot!  

Tips and serving: 

  • For an extra flavor boost, add some diced bell peppers or chopped fresh cilantro to the pot during the last 5 minutes of cooking. 
  • You can serve black beans and rice with chicken and steaks  
  • Leftover black beans and rice make a great filling for tacos or burritos! 
  • Corn, Crushed, or fresh chopped tomatoes can also be added per taste. 

Add more flavor: 

You can change the taste of your black beans and rice by adding chopped green olives and pimentos from a can. This will combine salty and sweet tastes in a way that will make you want more.
Get ready to finish preparing your meals! This black bean and rice recipe is good for you and tastes great. It will become your new favorite meal. This easy, delicious meal is a hit with both students and parents. You’ll enjoy the food more. 

Simple And Savory: Mastering The Art Of French Crêpes

0

Prep Time: 10 minutes 

Cook Time: 20 minutes 

Total Time: 30  

Do you sometimes crave something that will satisfy your taste buds and keep you feeling light? Discover French pancakes by joining us! These flaky, buttery delights are ideal with any meal in the morning for breakfast or at night for dinner savory. No sophisticated equipment is required- just a blender and skillet that will serve as the pot in cooking. Brace your palate for a ride to another taste level, as the crepes will lead you to a brand-new food dimension. 

What Exactly Is A Crêpe? 

Instead of the pancake with its thicker texture, the crêpe doubles as a wafer-thin bite of heaven sporting the crisp edges. They are so flexible, allowing you to roll, fold, or stuff them with some moist, fresh fruit, cream, salads, meats, or cheese. 

Ingredients You’ll Need: 

1.      All components needed for the basic crepe recipe can be found in your kitchen cupboard. 

2.      1 cup unbleached all-purpose flour 

3.      One tablespoon of granulated sugar 

4.      ¼ teaspoon kosher salt 

5.      1 ½ cups whole milk, room temperature 

6.      Four large eggs, room temperature 

7.      Three tablespoons unsalted butter melted, plus more for brushing 

Making Homemade Crêpes: 

Here’s how to whip up your batch of homemade crêpes:  

1. Mix the Batter: Start by gently mixing in milk, eggs, and salt. First, include the flour, and again, mix in the melted butter until the entire mix is smoothly blended.  

2. Rest the Batter:If you want to be a huge success, go with the best option: leave your batter chill in the fridge for at least 30 minutes, and then combine all the ingredients more perfectly than ever before.  

3. Cook: On medium heat, use a non-stick pan and put some skimmed butter to fry it. Pour the small batter in the middle, carefully stirring to the handle to spread the batter thin. Stir with a spoon until the mix progresses and starts lifting the pan’s sides, then flip to brown the other side as well.  

4. Stack and Store: Keeping the pan ready is also important because it will allow you to cook the rest of the crêpes quickly without drying up or stiffening. 

Folding and Filling Your Crêpes: Get creative with how you serve your crêpes. They can be folded into triangles, rolled like burritos, or made into a layered crêpe cake. Fill them with: 

Sweet spreads like jam, hazelnut chocolate, chocolate ganache, lemon, and sugar. 

Savory fillings like homemade pesto, Greek yogurt, and fresh fruits are also available. 

Serving Suggestions: 

Why not set up the crepe bar? Enjoy the lovely experience with your friends and family. Set up many filling possibilities and allow everyone to create masterpieces to resurrect this French legacy.  

Storing your crêpes:  

Crepes are best fresh, but if you need to store them: 

Keep refrigerated: Layer crepes between layers of wax paper and seal them in a container with a cover that will prevent access by outside air. Please give them your cookie caddie; they will be fresh for up to two days.  

For Longer Storage: Refer to your Instruction Manual for details.  Freeze them for up to two months. Just thaw and fry away for use in a skillet.  

Whether you are on the lookout for a perfect sweet and sour breakfast or a satiating savory lunch, you can grab a crêpe and enjoy it. Using this tutorial, you’ll see that it is as easy to prepare crêpes as they are yummy. Save yourself the time today and embark on creating crêpes, which will bring a French touch of style to your table! 

Tried making these crêpes? Let us see your best stuffing flavors, or send us a shot of your creation to our Instagram handle and get the chance to be featured on our page! Do not hesitate to show us how you achieve that comforting look in your French kitchen! 

How To Make Easy Pizza Sauce At Home

0

You don’t need to look further if you want a tasty homemade pizza. This simple pizza sauce recipe changes everything. You can make a delicious sauce quickly with just a few easy items and no cooking needed. This pizza sauce recipe is simple, quick, and tasty. It will make your pizza nights better! 

Why Make Your Pizza Sauce? 

It’s fun and gives you more control over the tastes and ingredients of making your pizza sauce at home. Store-bought sauces often have added sugars and chemicals, but this fresh, healthy, and flavorful sauce you make is the opposite. It’s simple to make and only needs a few everyday store items. 

Ingredients You’ll Need 

Here’s what you’ll need to make this simple and delicious pizza sauce: 

  •        1 (15 ounces) can tomato sauce
  •        1 (6 ounces) can tomato paste
  •        1 tablespoon ground oregano
  •        1 ½ teaspoons dried minced garlic
  •        1 teaspoon ground paprika

How to Make Easy Pizza Sauce 

Gather Your Ingredients: First, gather all of your materials together. The process will go more quickly and easily if you have everything ready. 

Mix Tomato Sauce and Tomato Paste: Combine the tomato sauce and tomato paste in a medium bowl and mix until smooth and well-mixed. 

Add Spices: Add the dry minced garlic, ground oregano, and ground paprika and mix them in. Mix the spices into the sauce until they are evenly distributed. 

Ready to Use: You can now use your pizza sauce! Spread it on your pizza dough and then add your favorite things. 

Easy Ways to Make the Best Pizza Sauce 

Here are some tips that will help you make excellent pizza sauce every time: 

Use Good Ingredients: This sauce only needs a few things to make it taste great, so using good tomato sauce and tomato paste will make a big difference. 

Change the seasonings: You are welcome to change the spices to your liking. If you like things a little spicy, add some red pepper flakes. If you want a spicier herb taste, add more oregano. 

If you want the sauce lighter, add water until you reach your desired consistency. 

On How to Keep Pizza Sauce Fresh 

You can keep sauce in the fridge for up to a week if you put it in a jar that won’t let air in. This sauce freezes well, too. Please put it in a container or zip-top bag that can go in the freezer and freeze for up to three months. Let it thaw in the fridge overnight before you use it. 

Combinations of tasty pizzas 

Now that you have pizza sauce ready, here are some ideas for toppings that will make you want to make another pizza: 

  •        Add fresh cheese, basil leaves, and a drizzle of olive oil to the top of a classic Margherita.
  •        Our family loves pepperoni and cheese, made with many pepperonis and chopped mozzarella cheese.
  •        Veggie Delight: Put bell peppers, onions, mushrooms, olives, and spinach on your pizza.
  •        BBQ Chicken: Instead of some pizza sauce, use BBQ sauce. Then, add grilled chicken, red onions, and parsley on top.

One simple thing you can do to improve your pizza game is to make your pizza sauce. This easy pizza sauce recipe only needs a few things and doesn’t need to be cooked. This sauce will wow everyone, whether you’re making pizza for a quick get-together or a family night. Use this tasty sauce on your homemade pies and enjoy! 

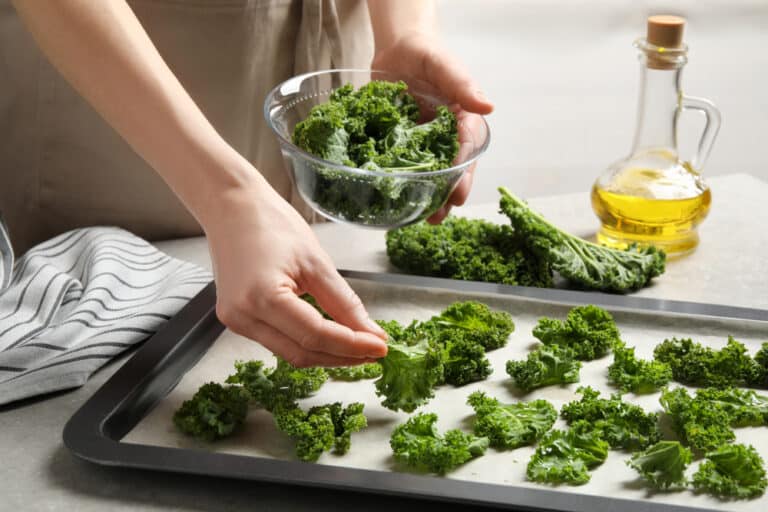
Homemade Crispy Kale Chips: Your New Favorite Snack 

Hey there! Are you ready to elevate your snack game to a new level of deliciousness and health? Dive into the world of homemade kale chips, a snack that’s easy to make and incredibly nutritious and satisfying. Perfect for those mid-afternoon cravings or as a healthy party appetizer, these kale chips are about to become your new favorite go-to snack. 

Why Kale Chips? 

Kale, known for its health benefits, makes an excellent snack when baked into chips. Rich in vitamins A, K, and C and minerals like calcium and iron, kale offers a nutritional punch. The best part? Kale chips provide that much-loved crispy texture without the guilt associated with traditional snacking options. They’re low in calories and fiber, making them a perfect fit for a healthy diet. 

Simple Steps to Crispy Perfection 

Transforming a leafy green into a crispy treat is easier than you might think. Here’s your quick guide to perfect kale chips: 

1. Choose Your Kale: Opt for fresh, organic kale for the best results. Curly kale tends to yield the crispiest chips due to its rugged texture. 

2. Wash and Dry Thoroughly: The secret to crispy kale chips lies in how dry you can get the leaves after washing. Any moisture can steam the chips while baking, leading to a chewy texture instead of a crisp one. 

3. Lightly Season: A little olive oil and a sprinkle of sea salt are all you need. Ensure the leaves are evenly coated but not drenched in oil. 

Baking Your Kale Chips 

Arrange the seasoned kale on a parchment-lined baking sheet without overlapping the leaves. This ensures they all can bake evenly and crisp up perfectly. Bake at 300°F (150°C) and check around 15 minutes to avoid burning. Depending on your oven, achieving the perfect crispness might take up to 30 minutes. 

Expert Tips for Ultimate Kale Chips 

  • Even Spacing: Spread kale in a single layer with space around each leaf. This helps the hot air circulate better, ensuring each piece crisps up. 
  • Temperature Control: Keep the oven low to dry the kale without burning it. Patience is key! 
  • Experiment with Flavors: After mastering the bare salted kale chips, try adding various seasonings such as chili powder, vinegar powder, or nutritional yeast for a cheesy flavor without the cheese. 

Storing Kale Chips 

If you have leftovers, store them in an airtight container at room temperature. They’re best enjoyed within a few days before they start to soften. You can re-crisp them in the oven for a few minutes if they lose crispness. 

Serving Suggestions 

While kale chips are fantastic, they’re also versatile in other culinary uses. Crumble them over soups or salads for a crunchy topping, or incorporate them into a trail mix for an extra nutrient boost. 

Community Praise and Customizations 

Our community loves to get creative with their kale chips. Here are a few popular modifications: 

  • Garlic Parmesan: Add minced garlic and a grated Parmesan before baking. 
  • Spicy Sriracha: Mix a few drops of Sriracha with the olive oil for chips with a kick. 
  • Sweet Cinnamon: Toss with a bit of cinnamon and a splash of maple syrup for a sweet version. 

Why You Should Try Making Kale Chips 

Creating kale chips is fun and allows you to customize ingredients for your taste and dietary needs. It’s a fantastic way to encourage kids and adults alike to enjoy their greens in a fun and tasty way. Plus, preparing this snack at home is far more economical and healthier than store-bought alternatives. 

So why not whip up a batch of these crispy delights today? They’re sure to impress both your taste buds and your guests. Enjoy the crunch! 

Homemade Crispy Hash Browns: A Breakfast Delight

Who does not love the comforting crunch of crispy hash browns? If you believe that potatoes improve every meal, this hash brown dish will impress you. If you want a great way to start the day, whether it is a busy weekday or a lazy Sunday morning, these golden treats go lovely with eggs, bacon, or your favorite breakfast sides. 

Just Why Hash Browns Are So Great For Breakfast 

The Hasselback potatoes are definitely cozy. Maybe the warm, soft bellies or the golden, crispy ends. Simply put, they make any plate of food stand out. You can easily make this dish for breakfast that tastes like the one at your favorite diner. 

Easy Ways To Make Perfect Hash Browns 

No rocket science is needed to make the perfect hash brown—it is very easy. Start by picking the right potatoes. For the best crispiness, choose dry potatoes like russets. After grating the potatoes, rinse them in clear water to get rid of any extra starch. The key to the ultimate crunch lies in drying the potatoes thoroughly before mixing them with a small quantity of flour and egg to bind them. 

Once mixed, shape your potatoes into patties. You can go large for a family-style hash brown or smaller for individual servings. Heat oil in a skillet until it sizzles, then carefully lay in your hash browns. Cook them on each side for about five minutes until they are crispy and beautifully golden. 

Ensuring Your Hash Browns Do Not Fall Apart 

Moisture is the enemy of the perfect hash brown. Squeeze out as much liquid as you can from the grated potatoes before adding your binders. If you are worried about your hash browns breaking apart, a little cheese mixed into the batter can act as a delicious glue, melting and binding the ingredients together as they cook. 

Flexible, Tasty, And Amazingly Simple 

Browns are a great side dish whether you are cooking for one or a lot of people. In addition to breakfast, you can eat them with a salad for lunch or as a side dish for dinner. Anyone who cooks should have this dish in their repertoire because it can be made in many ways and only needs a few simple items. 

Don’t forget that the beauty of hash browns is in how simple and crispy they are. If you try this recipe once, it might become your best way to make breakfast, and you can make it however you like. From changing the spice to changing how they are served; hash browns are a great way to show off your morning mood through food. Why not act now? Make your own hash browns to take your breakfast to a whole new level. They are crispy and warm. 

Homemade Black Bean Veggie Burgers: A Flavorful Vegetarian Delight

0

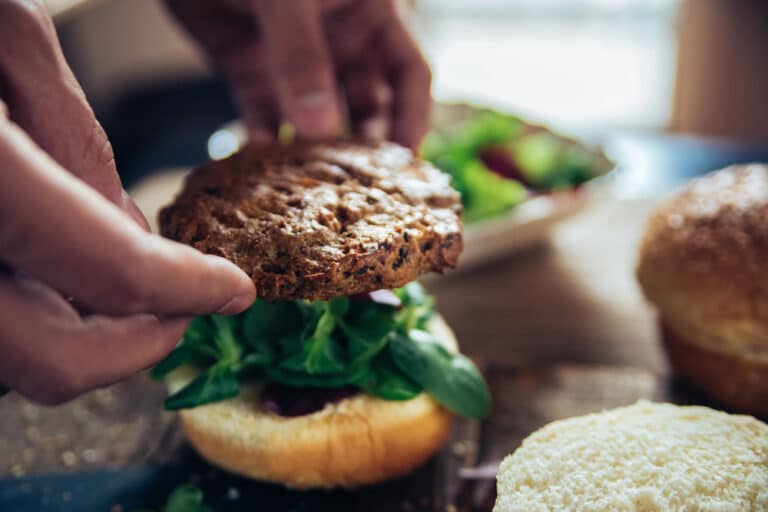
Are you ready to make the best veggie burger ever? This recipe for black bean veggie burgers you can make at home is fantastic. These burgers are tasty, healthy, and filling because the tastes and textures are just right. Put away your frozen veggie burgers, and bring on this quick, easy, and tasty option! 

Why Green Bean Black Bean Burgers Are Great? 

Black bean veggie burgers are a great way to eat without meat that does not lack taste. Because they are full of healthy vegetables and spices, these burgers are a hearty and good choice. They are great for vegetarians and people who want more plant-based foods. They are also very flexible because you can add your favorite sauces and sides to make them your own. 

toppings and sides. 

Ingredients You’ll Need 

Here’s a simple list of ingredients to get you started: 

  • 1 (16 ounce) can black beans, drained and rinsed 
  • ½ green bell pepper, cut into 2-inch pieces 
  • ½ onion, cut into wedges 
  • 3 cloves garlic, peeled 
  • 1 egg 
  • 1 tablespoon chili powder 
  • 1 tablespoon cumin 
  • 1 teaspoon Thai chili sauce or hot sauce 
  • ½ cup bread crumbs 

How to Make Black Bean Veggie Burgers 

How to Make Vegetable Burgers with Black Beans 

It is effortless to make these black bean veggie burgers. To help you, here is a step-by-step guide: 

1. Heat up and get ready: Set the grill outside to high heat and lightly oil a piece of metal foil with cooking spray.

2. Mash the Beans: Mash the black beans in a medium bowl with a fork until they are thick and pasty.

3. Prepare the vegetables: Use a food processor to chop the bell pepper, onion, and garlic into very small pieces. Add the chopped veggies to the cooked beans and mix them in.

4. Mix the parts together: In a small bowl, mix the egg, chili powder, cumin, and chili sauce. Stir this into the cooked beans. It is ready to be used when the bread crumbs are added and thoroughly mixed.

5. Make the patties: The mixture should make four patties. Place them on the prepared paper.

6. Cook the patties: Put them on a grill that has already been heated up for about 8 minutes on each side or until they are hot all the way through and have a nice char.

Baking Option 

If you want to bake the black bean burgers, warm the oven to 375 degrees F (190 degrees C). Spread some oil on a baking sheet and put the burgers on it. Bake for 10 minutes on each side. 

Serving Suggestions 

Black bean veggie burgers are versatile and pair well with a variety of sides. Here are a few ideas to inspire you: 

  • Simple Pasta Salad 
  • Oven-Fresh Seasoned Potato Wedges 
  • Mexican Corn on the Cob (Elote) 

Storing and Freezing 

Put cooked black bean burger patties in a container that will not let air in. Store in the fridge for up to four days. You can heat them again in the oven, microwave, or stove. 

Of course, you can freeze these burgers for later use. Put the patties on a baking sheet and flash-freeze them for a few hours. Then, move them to a freezer bag with a zipper or another container that can go in the freezer. You can freeze them for two months. 

You have to try these black bean veggie burgers, which you can make yourself. They taste great, are easy to make, and contain healthy foods. Whether you are a seasoned veggie or want to try something new, these burgers are great. Try them, and you will have a tasty meatless meal that everyone will love.